Delicious Homemade Little Debbie Christmas Tree Cakes Recipe You’ll Absolutely Love!
Bring Back the Magic of Christmas with Every Bite
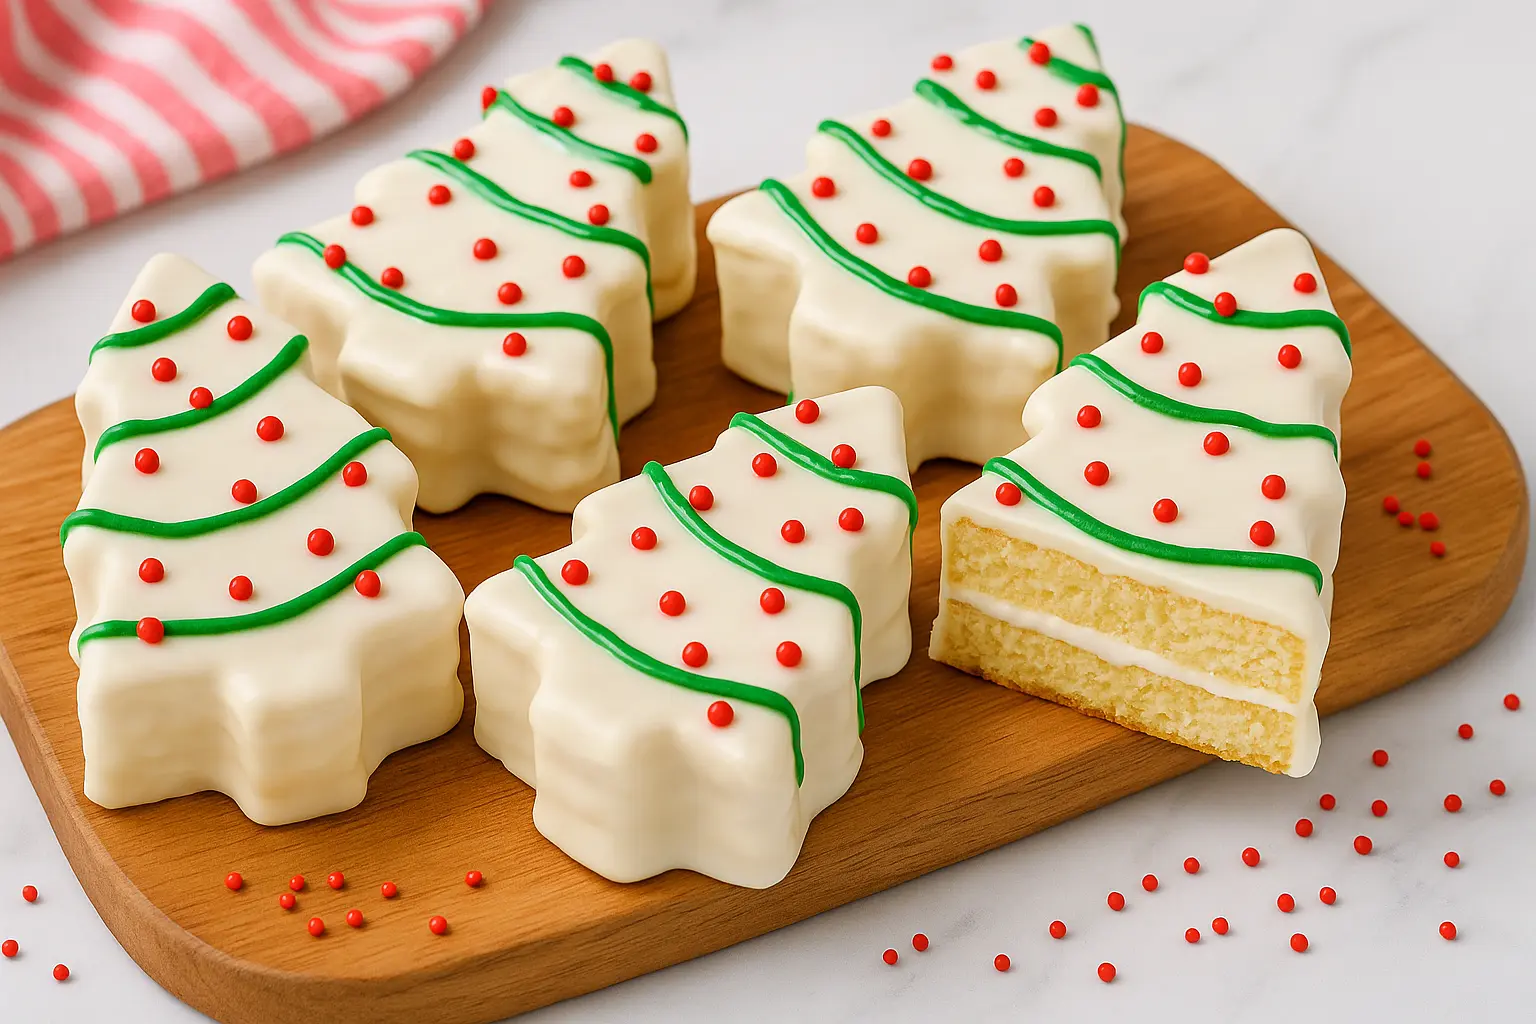
Little Debbie Christmas Tree Cakes are more than just a holiday snack — they’re a cherished symbol of Christmas nostalgia. That soft vanilla cake layered with creamy filling, coated in sweet white chocolate, and topped with festive green icing instantly brings back childhood memories. In this guide, you’ll learn how to recreate that magic right in your own kitchen.
With this homemade version, you’ll enjoy all the classic flavors of your favorite holiday treat — but fresher, richer, and baked with love. Whether you’re making them for a family gathering, gifting them to friends, or simply indulging your sweet tooth, this recipe will make your Christmas season extra special.
Table of Contents
Why Everyone Loves Little Debbie Christmas Tree Cakes
If you grew up in the U.S., there’s a good chance these holiday snacks were part of your Christmas traditions. But what makes Little Debbie Christmas Tree Cakes such a beloved treat?
The Story Behind the Iconic Holiday Treat
First introduced in the 1980s, these cakes quickly became a seasonal staple. Wrapped in festive green and red packaging, they symbolized the arrival of Christmas. Over time, their simple yet nostalgic charm transformed them from a snack into a holiday tradition — something families look forward to every winter.
What Makes These Cakes So Irresistible
You love them for their texture — that light vanilla sponge paired with a creamy filling and sweet coating. You love the shape — a little Christmas tree decorated with green garlands and red sprinkle ornaments. And you love what they represent — nostalgia, celebration, and comfort.
Ingredients You’ll Need for Homemade Little Debbie Christmas Tree Cakes
Here’s everything you’ll need to create your own batch of these festive delights.
| Ingredient | Quantity |
|---|---|
| All-purpose flour | 2 cups |
| Baking powder | 1 ½ tsp |
| Unsalted butter (softened) | ½ cup |
| Granulated sugar | 1 cup |
| Eggs | 3 large |
| Vanilla extract | 2 tsp |
| Whole milk | 1 cup |
| Marshmallow crème | 1 jar |
| White chocolate or candy coating | 1 bag |
| Green icing | As needed |
| Red sprinkles | As needed |
Tip: Use high-quality vanilla extract and fresh butter for the best flavor. The richness of your ingredients will directly affect the cake’s taste and texture.
Step-by-Step Guide: How to Make Little Debbie Christmas Tree Cakes at Home
Ready to bring the nostalgia to life? Follow these simple steps to recreate your favorite holiday treat.
Step 1: Prepare the Cake Batter
- Preheat your oven to 350°F (175°C).
- Grease and line a baking sheet with parchment paper.
- In a large bowl, whisk together flour and baking powder.
- In another bowl, beat butter and sugar until light and fluffy.
- Add eggs one at a time, followed by vanilla extract.
- Slowly alternate adding dry ingredients and milk until you have a smooth batter.
Step 2: Bake to Perfection
Pour the batter evenly into your prepared baking sheet. Bake for 18–22 minutes or until a toothpick comes out clean. Let it cool completely before shaping.
Step 3: Cut into Christmas Tree Shapes
Once cooled, use a Christmas tree cookie cutter or stencil to cut out your tree shapes. If you want to match the Little Debbie look, aim for a 3–4 inch height per cake.
Step 4: Fill and Layer
Spread a generous layer of marshmallow crème (or vanilla frosting) between two matching tree shapes. Press gently to hold them together without squeezing the filling out.
Step 5: Dip in White Chocolate Coating
Melt your white chocolate or candy coating in a microwave-safe bowl, stirring every 30 seconds until smooth. Carefully dip each cake into the coating, making sure it’s evenly covered. Place them on parchment paper to set.
Step 6: Decorate Like the Original!
Once the coating is firm, pipe on green icing garlands and sprinkle with red sugar dots. This final step brings your creation to life — visually festive and ready to impress.
Pro Tips for the Perfect Homemade Little Debbie Christmas Tree Cakes
Even a simple recipe can go wrong without the right technique. Here’s how you can ensure bakery-quality results every time.
Achieving the Perfect Moist Texture
- Use room-temperature ingredients for even mixing.
- Avoid overmixing the batter — that can make the cake dense.
- If you have time, chill the batter for 10 minutes before baking for a fluffier texture.
Mastering the Coating Process
- Make sure your cakes are completely cool before dipping.
- If the coating is too thick, add a teaspoon of vegetable oil to thin it out.
- Chill dipped cakes for 10–15 minutes before decorating.
Storage and Freshness Tips
- Store your cakes in an airtight container to maintain moisture.
- Keep them refrigerated for up to 5 days.
- For longer storage, freeze individually wrapped cakes for up to 2 months.
Creative Twists on the Classic Little Debbie Christmas Tree Cakes
You can stick to tradition, or you can make it your own. Here are a few creative takes to try.
Chocolate Lover’s Version
Replace the white chocolate coating with milk or dark chocolate. Top with gold sprinkles for an elegant twist.
Peppermint Crunch Edition
Add crushed candy canes to the coating before it sets. The minty crunch pairs perfectly with the vanilla sponge.
Mini Bites for Parties
Cut smaller tree shapes and serve bite-sized versions on dessert trays. They’re perfect for kids’ parties or office gatherings.
Serving Ideas and Presentation Tips
Your homemade Little Debbie Christmas Tree Cakes deserve a festive stage.
Festive Dessert Platters
Arrange your cakes on a platter with pine branches or Christmas ornaments for a picture-perfect display.
DIY Gift Boxes
Wrap individual cakes in cellophane with a ribbon and a personalized gift tag. They make thoughtful, edible gifts that bring joy to anyone who receives them.
Nutritional Information (Approximation)
| Nutrient | Amount (per cake) |
|---|---|
| Calories | 250–280 kcal |
| Fat | 12 g |
| Carbohydrates | 32 g |
| Protein | 3 g |
Note: These values are estimates and can vary depending on ingredient brands and portion size.
FAQs About Little Debbie Christmas Tree Cakes Recipe
Can I make these Little Debbie Christmas Tree Cakes ahead of time?
Yes, you can bake and decorate them a day in advance. Just store them in an airtight container to keep them soft and fresh.
What’s the best substitute for marshmallow crème?
If you don’t have marshmallow crème, use vanilla buttercream or homemade marshmallow fluff.
Can I freeze homemade Little Debbie Christmas Tree Cakes?
Absolutely. Freeze them for up to 2 months. Let them thaw at room temperature before serving.
Why does my coating crack?
Cracking usually happens when you dip cakes that are too warm or overheat your coating. Let your cakes cool and keep your coating smooth and warm, not hot.
Can I make gluten-free or vegan versions?
Yes. Use gluten-free flour and dairy-free butter, milk, and white chocolate alternatives.
How close does this taste to the real Little Debbie version?
Many home bakers find the homemade version tastes even better — softer, fresher, and less processed.
Conclusion: Relive the Holiday Magic One Bite at a Time
There’s something incredibly heartwarming about recreating a treat that defined your childhood holidays. With this homemade Little Debbie Christmas Tree Cakes recipe, you’re not just baking — you’re reviving tradition, sharing joy, and making memories.
So go ahead — gather your ingredients, preheat that oven, and start baking your way into the spirit of Christmas. Once you taste that first bite — moist cake, creamy filling, sweet coating — you’ll know it was worth every minute.
For more inspiration or to see where it all began, visit LittleDebbie.com and explore the original creations that inspired this homemade masterpiece.