How to Make Lemon Cheesecake Tarts: The Irresistible, Easy & Delicious Recipe Guide
Introduction: A Bite of Sunshine in Every Tart
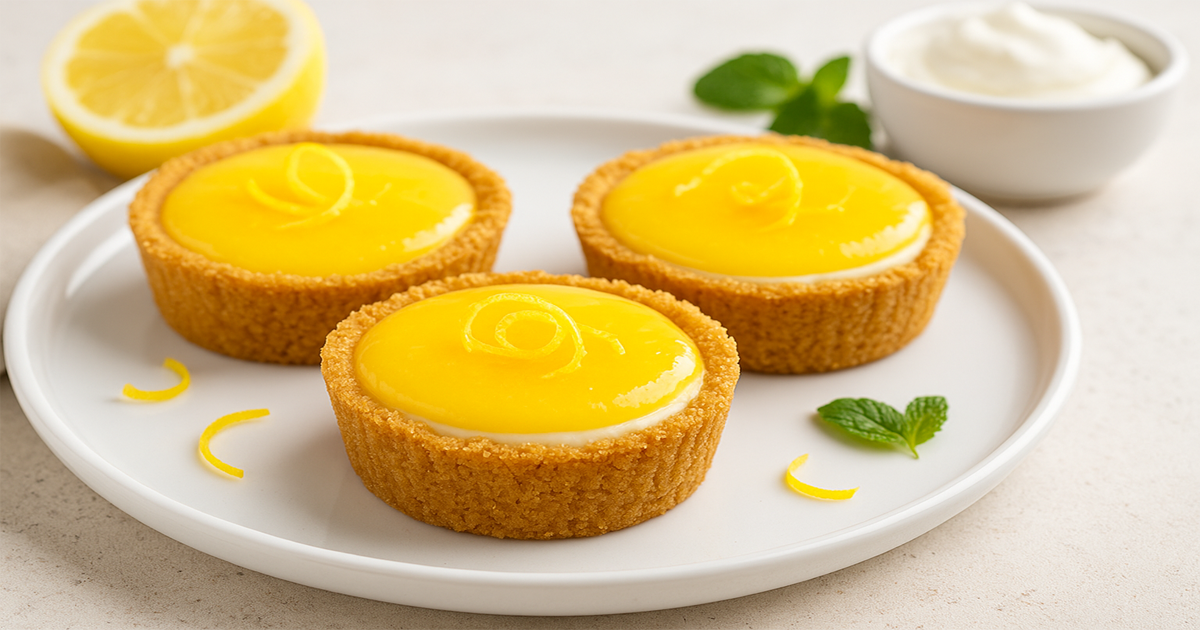
Picture this — a buttery crust that crumbles gently beneath your fork, a creamy cheesecake center that melts on your tongue, and a burst of tangy lemon that makes your taste buds dance. If you’re looking for a dessert that’s both elegant and easy, Lemon Cheesecake Tarts are your perfect match.
You’ve probably tasted a lemon dessert before — maybe a pie or a slice of cheesecake — but there’s something magical about these little tarts. They’re compact, charming, and incredibly satisfying. Whether you’re planning a weekend get-together or simply craving a homemade treat, these tarts will brighten your day (and your table) with a touch of sunshine.
Table of Contents
Why You’ll Fall in Love with Lemon Cheesecake Tarts
There’s a reason these tarts steal the spotlight at every gathering — they’re irresistible. You get the best of both worlds: the richness of cheesecake and the fresh zing of lemon.
Perfect Dessert for Every Occasion
You don’t need a fancy reason to make Lemon Cheesecake Tarts. They’re a hit at:
- Summer picnics and brunches
- Birthday celebrations
- Tea parties
- Cozy evenings when you just want something sweet
What makes them special is their versatility. They’re simple enough for beginners and impressive enough for guests. Plus, their mini size means you can serve them individually — no slicing, no mess, just pure enjoyment.
Essential Ingredients for Lemon Cheesecake Tarts
Before diving into the recipe, let’s gather everything you’ll need. High-quality ingredients make all the difference between an ordinary tart and one that truly wows.
Ingredients Table
| Ingredient | Quantity | Purpose / Notes |
|---|---|---|
| Graham Crackers (crushed) | 1 cup | Used for the crust base |
| Unsalted Butter (melted) | ¼ cup | Helps bind the crust |
| Cream Cheese (softened) | 8 oz | Provides creamy texture |
| Granulated Sugar | ½ cup | Sweetens both crust and filling |
| Lemon Juice (freshly squeezed) | 2 tbsp | Adds tang and brightness |
| Lemon Zest | 1 tbsp | Enhances flavor and aroma |
| Eggs | 2 | Adds structure to cheesecake filling |
| Vanilla Extract | 1 tsp | Balances tartness with warmth |
| Sour Cream | ¼ cup | Adds smoothness and richness |
| Optional Toppings | To taste | Whipped cream, berries, mint leaves |
Step-by-Step Guide: How to Make Lemon Cheesecake Tarts
Ready to create something special? Follow these easy, foolproof steps and your Lemon Cheesecake Tarts will come out beautifully every single time.
Step 1: Prepare the Crust
- Start by crushing your graham crackers until fine — you can use a food processor or a rolling pin.
- Mix the crumbs with melted butter and a spoonful of sugar.
- Press the mixture into tart molds or muffin tins to form a firm base.
- Bake at 350°F (175°C) for about 7–8 minutes, then let them cool.
💡 Pro Tip: For a crispier crust, pre-bake a little longer, but keep an eye on them — golden, not brown, is what you want.
Step 2: Make the Creamy Cheesecake Filling
- In a mixing bowl, beat the softened cream cheese until smooth.
- Add sugar, lemon zest, and vanilla extract, mixing gently.
- Whisk in the eggs one at a time, followed by the sour cream and lemon juice.
- Blend until creamy but avoid overmixing — air bubbles can cause cracks while baking.
Your mixture should look silky and smell heavenly — that’s when you know it’s ready.
Step 3: Add the Tangy Lemon Topping
To elevate the flavor, create a quick lemon curd topping:
- Whisk together sugar, lemon juice, zest, and eggs over low heat.
- Stir until thickened, then remove from heat and blend in butter.
- Let it cool before spreading over the baked cheesecake tarts.
This layer adds a punchy lemon flavor that perfectly complements the creamy cheesecake.
Step 4: Bake and Chill for the Perfect Texture
- Pour the cheesecake mixture over your crusts.
- Bake at 325°F (160°C) for about 18–20 minutes, or until the centers are just set.
- Let them cool at room temperature, then refrigerate for at least 3 hours.
Overnight chilling gives you the best texture — firm yet melt-in-your-mouth smooth.
Expert Tips for Perfect Lemon Cheesecake Tarts
Here’s how you can turn your tarts from good to absolutely unforgettable:
- Always use room-temperature cream cheese to avoid lumps.
- Fresh lemon juice is non-negotiable — bottled juice can dull the flavor.
- Don’t skip chilling; it sets the texture and deepens the flavor.
- Use silicone tart molds for easy removal.
- Add a few berries or a dollop of whipped cream for visual flair.
Common Mistakes to Avoid
Even simple recipes can go wrong without a few precautions:
- Overbaking: This causes cracks on the surface.
- Skipping chill time: The texture won’t set properly.
- Too much lemon juice: It can make your filling runny.
- Mixing too aggressively: Incorporates too much air and creates bubbles.
Creative Variations of Lemon Cheesecake Tarts
You can easily customize this recipe to match your mood or dietary needs.
- No-Bake Version: Use chilled biscuit crust and refrigerate filling instead of baking.
- Mini Lemon Cheesecake Bites: Perfect for parties or bite-sized treats.
- Gluten-Free Option: Swap graham crackers for almond flour or gluten-free cookies.
- Tropical Twist: Add coconut flakes or a hint of mango puree for a beachy flavor.
Serving & Presentation Ideas
Presentation makes all the difference. Try these simple yet elegant serving ideas:
- Garnish with lemon zest curls or edible flowers.
- Dust with powdered sugar for a professional finish.
- Serve on pastel or ceramic plates to contrast the vibrant yellow filling.
- Add fresh raspberries or mint leaves for a refreshing touch.
💡 Photography Tip: If you’re planning to post your tarts online, shoot them in natural daylight for that irresistible golden glow.
Nutritional Information
| Nutrient | Per Tart (approx.) |
|---|---|
| Calories | 230 kcal |
| Fat | 12 g |
| Sugar | 18 g |
| Protein | 4 g |
| Carbohydrates | 22 g |
These tarts aren’t exactly “light,” but they’re worth every bite — moderation is key, and happiness counts too!
Storage and Make-Ahead Tips
You’ll be glad to know Lemon Cheesecake Tarts store beautifully.
- Refrigerate: Keep them in an airtight container for up to 3–4 days.
- Freeze: They’ll last up to 1 month when wrapped individually.
- Serve chilled: Always let them thaw in the fridge for a few hours before serving.
If you’re planning for a party, prepare them a day in advance — it saves time and enhances flavor.
Pairing Suggestions
These tarts pair perfectly with:
- Hot tea or coffee for an afternoon pick-me-up
- Sparkling lemonade for a citrusy combo
- Vanilla ice cream for an indulgent twist
They’re the kind of dessert that complements almost any beverage or occasion.
FAQs About Lemon Cheesecake Tarts
1. Can I make Lemon Cheesecake Tarts without baking?
Yes! You can make a no-bake version using crushed biscuits and butter for the base, then chill the cheesecake filling until firm.
2. How long can Lemon Cheesecake Tarts last in the fridge?
They stay fresh for about 3–4 days when stored in a sealed container.
3. What’s the secret to a smooth cheesecake filling?
Use room-temperature ingredients and mix slowly to avoid air bubbles.
4. Can I replace lemon with lime or orange?
Absolutely. Lime gives a sharper taste, while orange adds sweetness — both are delicious.
5. How can I make these tarts healthier?
Use low-fat cream cheese, Greek yogurt, or honey instead of sugar.
6. What toppings go best with Lemon Cheesecake Tarts?
Fresh berries, whipped cream, or candied lemon peel are perfect finishing touches.
Conclusion: Bring Sunshine to Your Table
There’s something joyful about Lemon Cheesecake Tarts. They’re bright, creamy, and bursting with flavor — a dessert that feels like summer on a plate. When you take that first bite, you’ll taste the love, care, and freshness baked into every layer.
So the next time you want to impress your guests (or treat yourself), you know what to make. Gather your ingredients, preheat your oven, and create something unforgettable — one tart at a time.
Try this recipe today, snap a photo, and share your creation with friends or online. You’ll inspire others to add a little zest to their kitchen too!