Grandma’s Perfect Pie Crust
When the holidays roll around I find myself standing in my kitchen, flour dusting the countertops, and wondering how to capture that nostalgic flavor my grandmother used to serve. Grandma’s Perfect Pie Crust became my secret weapon, not because it’s a shortcut, but because it reminds me of evenings spent rolling dough while the radio played old swing tunes.
I first tried this crust last winter, when a sudden snowstorm trapped us inside and I needed a comforting dessert to lift spirits. The result was a buttery, flaky base that held up perfectly under a mountain of spiced apples, and it still feels like a warm hug every time I pull it from the oven.
Table of Contents
My Experience With This Grandma’s Perfect Pie Crust Recipe
I made this crust on a rainy Saturday in December, hoping to surprise my family with a classic apple pie for Christmas dinner.
The dough came together quickly, but I learned the hard way that chilling it for at least an hour is non‑negotiable
otherwise the edges shrink and the texture turns tough.
A small mistake I made was over‑mixing the butter into the flour, which made the crust a bit dense – a simple fix is to cut the butter into pea‑sized pieces and stop mixing once the mixture looks shaggy.
One practical tip I’ve carried forward: sprinkle a thin layer of coarse sugar on the rolled dough before adding the filling; it creates a subtle crunch that adds depth to every bite.
Ingredients Grandma’s Perfect Pie Crust Recipe
- 2 ½ cups all‑purpose flour, lightly spooned and leveled
- 1 teaspoon salt
- 1 teaspoon granulated sugar
- 1 cup (2 sticks) unsalted butter, cold and cut into cubes
- 6‑8 tablespoons ice‑cold water, added a tablespoon at a time
- Optional: 1 teaspoon lemon zest for a bright note
Timing Grandma’s Perfect Pie Crust Recipe
Preparing the dough takes about 15 minutes, chilling requires at least 60 minutes, and baking the crust is roughly 12‑15 minutes. In total you’ll need about 1 hour 30 minutes from start to finish, which fits nicely into a weekend baking session.
Step‑by‑Step Instructions Grandma’s Perfect Pie Crust
Step 1 – Mix dry ingredients
Combine flour, salt, and sugar in a large bowl. Toss the cold butter cubes in and use a pastry cutter or fingertips to work the butter into the flour until the pieces resemble coarse crumbs with some pea‑size bits.
Step 2 – Add water gradually
Sprinkle ice‑cold water over the mixture, stirring with a fork after each tablespoon. Stop adding water once the dough just holds together when pressed; over‑hydrating will make it sticky.
Step 3 – Form the dough ball
Gather the dough into a flat disc, wrap it in plastic, and refrigerate for at least an hour. This rest relaxes the gluten and keeps the crust tender.
Step 4 – Roll out the dough
On a lightly floured surface, roll the chilled disc into a 12‑inch circle. If the dough cracks, let it sit at room temperature for a few minutes before continuing.
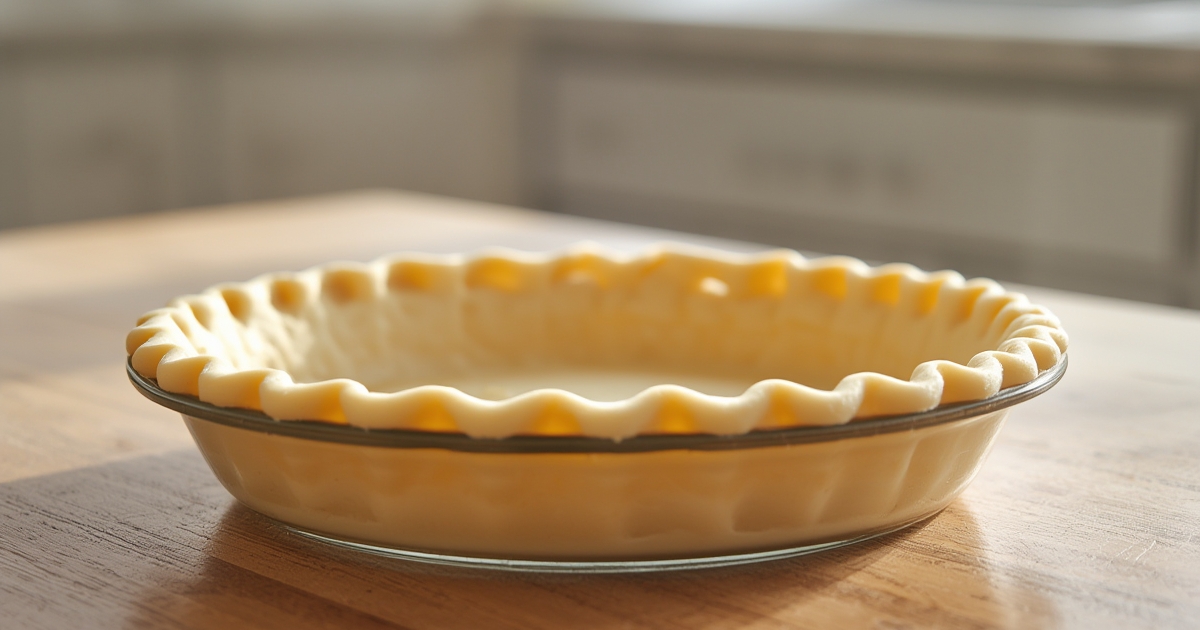
Step 5 – Transfer to pie pan and blind‑bake
Gently lift the rolled dough, drape it over the pan, and press lightly into the corners. Trim excess edges, then chill again for 15 minutes. Preheat the oven to 375 °F, line the crust with parchment, fill with pie weights or dried beans, and bake for 12‑15 minutes until lightly golden.
Step 6 – Fill and finish baking
Add your favorite filling, return to the oven, and bake until the filling bubbles and the crust turns a deep golden brown, about 35‑40 minutes.
Real Tips From My Kitchen
- Chill the dough thoroughly; it prevents shrinkage and yields a flaky texture.
- Use a light hand when mixing butter and flour to avoid a dense crust.
- Sprinkle a thin layer of coarse sugar on the rolled dough for a subtle crunch.
- Brush the crust with a beaten egg before baking for a glossy finish.
- Let the baked crust cool slightly before adding a moist filling to avoid sogginess.
Nutritional Information Grandma’s Perfect Pie Crust
One serving of this crust (about 1/8 of a 9‑inch pie) contains roughly 210 calories, 12 grams of fat, 22 grams of carbohydrates, and 2 grams of protein. The calories primarily come from butter and flour, providing a modest amount of energy without added sugars.
Healthier Alternatives
- Substitute half the all‑purpose flour with whole‑wheat pastry flour for added fiber.
- Replace half the butter with chilled coconut oil for a lighter fat profile.
- Use a blend of honey and a pinch of stevia instead of granulated sugar for a lower‑glycemic sweetener.
- Incorporate ground flaxseed into the dry mix to boost omega‑3 fatty acids and add a nutty flavor.
Serving Suggestions
Serve the pie warm with a scoop of vanilla bean ice cream, or drizzle caramel sauce over a slice for extra indulgence. A dollop of lightly sweetened whipped cream pairs beautifully with fresh berries on top. For a brunch twist, cut the crust into bite‑size squares and top each with a spoonful of ricotta mixed with honey and toasted almonds.
Common Mistakes to Avoid
- Over‑mixing the butter into the flour, which develops gluten and makes the crust tough.
- Skipping the chill time, leading to shrinkage and uneven baking.
- Using warm water, which melts the butter and reduces flakiness.
- Over‑filling the crust, causing spillage and uneven cooking of the filling.
- Baking at too high a temperature, which can brown the edges before the center sets.
Storing Tips for the Recipe
Wrap any leftover dough tightly in plastic wrap and store it in the refrigerator for up to three days, or freeze for up to two months. For baked crusts, let them cool completely, then place a sheet of parchment paper over the surface and store in an airtight container for 2‑3 days. Re‑heat gently in a 300 °F oven for 5‑7 minutes to restore crispness.
Conclusion
This crust has become my go‑to foundation for pies, tarts, and even savory hand‑helds. Its buttery layers and subtle sweetness bring a touch of nostalgia to every bite, and with a few simple adjustments it can suit a range of dietary preferences.
Give it a try, and let the aroma of freshly baked dough fill your kitchen with memories of family gatherings.
FAQs Grandma’s Perfect Pie Crust
Q: Can I use this Grandma’s Perfect Pie Crust for a savory quiche?
A: Absolutely. Omit the sugar and add a pinch of herbs to the dry mix for a flavorful savory base.
Q: What if I don’t have ice‑cold water?
A: You can use very cold milk or even chilled sparkling water; just keep the liquid icy to maintain butter temperature.
Q: How do I prevent the crust from becoming soggy with a juicy filling?
A: Brush the baked crust with a thin layer of melted egg white before adding the filling; it creates a moisture barrier.
Q: Can I make the dough ahead of time?
A: Yes. Prepare the dough, shape it into a disc, wrap tightly, and refrigerate for up to 48 hours or freeze for longer storage.
Q: Is it okay to use a food processor for mixing?
A: A food processor works well for quickly cutting butter into flour, but pulse briefly to avoid over‑processing.
Q: How can I make the crust gluten‑free?
A: Substitute the all‑purpose flour with a 1‑to‑1 gluten‑free flour blend that contains xanthan gum, and follow the same method.