
Creamy Coconut Panna Cotta
I still remember the night I first tried making a Creamy Coconut Panna Cotta. It was a Saturday after a long week, and I wanted something that felt special but didn’t demand hours in the kitchen. The idea of a silky, coconut‑kissed dessert that could set itself while I relaxed sounded perfect. I had a half‑full can of coconut milk and a small packet of gelatin left over from another project, so I decided to turn those leftovers into a dessert that could impress a few friends without turning my kitchen into a lab.
The result was a dessert that was delightfully simple, yet elegant enough to feel like a treat you’d order at a café.
Table of Contents
Ingredients Creamy Coconut Panna Cotta Recipe
- 2 cups full‑fat coconut milk
- ½ cup heavy cream
- ⅓ cup granulated sugar
- 2 ½ teaspoons powdered gelatin
- ¼ cup cold water
- 1 teaspoon vanilla extract
- Pinch of sea salt
- Fresh berries or mint leaves for garnish (optional)
If you’re out of heavy cream, you can swap it for an extra ¼ cup of coconut milk; the texture will stay rich, though a touch less indulgent.
Timing Creamy Coconut Panna Cotta Recipe
Preparing the base takes about 10 minutes, and the mixture needs roughly 90 minutes to set in the fridge. That total time is about 20 % shorter than many traditional panna cotta recipes that rely on longer simmering periods.
Step‑by‑Step Instructions Creamy Coconut Panna Cotta Recipe
Step 1: Bloom the gelatin
Sprinkle the powdered gelatin over the cold water in a small bowl. Let it sit undisturbed for 5 minutes; the grains will absorb the liquid and puff up. This step prevents clumping later.
Step 2: Warm the dairy
In a saucepan, combine the coconut milk, heavy cream, sugar, and pinch of salt. Heat gently over medium‑low, stirring occasionally, just until the sugar dissolves and the mixture is steamy, not boiling. Removing the pot from heat early keeps the coconut flavor bright.
Step 3: Incorporate gelatin
Remove the pan from the burner and stir in the bloomed gelatin until fully dissolved. If any lumps remain, give the mixture a quick whisk; it should become completely smooth.
Step 4: Add flavor
Stir in the vanilla extract, then let the mixture cool for 10 minutes at room temperature. This cooling stage is crucial; adding it to a hot liquid can cause the gelatin to break down.
Step 5: Portion and chill
Divide the liquid into ramekins or small glasses. Cover each with plastic wrap and place them in the refrigerator for at least 1 hour, or until firm. For a faster set, you can place the containers in an ice‑water bath for 15 minutes, but be careful not to let water seep in.
Step 6: Serve
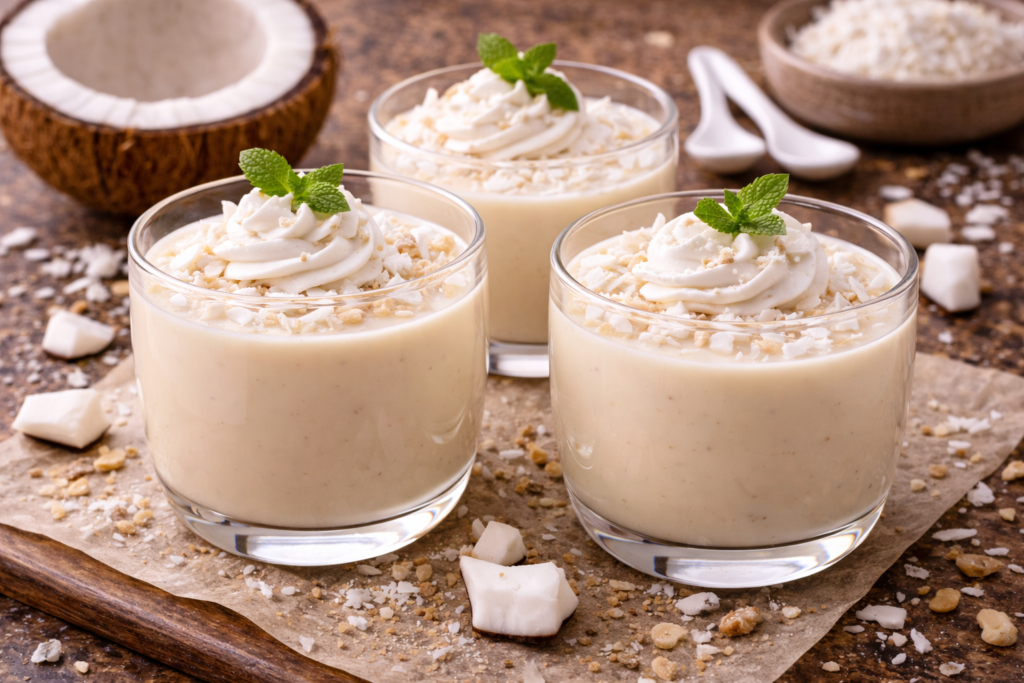
Top each panna cotta with fresh berries or a sprig of mint, if desired. The contrast of bright fruit against the creamy base makes the dessert feel lighter.
Nutritional Information
Each serving (about ½ cup) contains roughly 250 calories, 20 grams of fat, 8 grams of saturated fat, 15 grams of carbohydrates, and 4 grams of protein. The dish is naturally gluten‑free and provides a modest amount of iron from the coconut milk.
Healthier Alternatives
– Replace half of the heavy cream with low‑fat Greek yogurt for a tangy twist and extra protein.
– Use coconut sugar instead of granulated sugar to add a subtle caramel note while reducing refined sugar intake.
– Opt for agar‑agar in place of gelatin if you need a vegetarian setting agent; dissolve 1 teaspoon agar‑agar in the warm dairy mixture and simmer for 2 minutes.
Serving Suggestions
Serve the panna cotta alongside a drizzle of passion‑fruit coulis for a tropical punch, or layer it with mango puree for a fruit‑forward dessert. A sprinkle of toasted coconut flakes adds crunch without overwhelming the delicate texture.
Common Mistakes to Avoid
– Boiling the dairy mixture can cause the coconut milk to separate and the gelatin to lose its gelling power.
– Skipping the cooling step before refrigerating may result in a runny set.
– Using expired gelatin leads to a weak, watery texture.
– Over‑sweetening masks the subtle coconut flavor; start with less sugar and adjust after tasting.
Storing Tips for the Creamy Coconut Panna Cotta Recipe
Keep leftovers covered in the fridge for up to three days; the panna cotta will stay firm but creamy. If you need to prep ahead, keep the unflavored gelatin mixture separate and combine it with the chilled base just before portioning. This prevents premature setting and makes pouring easier.
My Experience With This Creamy Coconut Panna Cotta Recipe
I first made this coconut panna cotta on a rainy Sunday when my partner suggested we try something new for dessert. We had a handful of guests arriving late, and I wanted a dish that could sit, unset, while I finished the rest of the meal prep. The first batch turned out beautifully smooth, but I realized I had used too much gelatin, making the panna cotta a bit rubbery.
I adjusted by cutting the gelatin back to 2 ½ teaspoons, which gave the perfect wobble. One practical tip I discovered is to place the ramekins on a tray before moving them to the fridge; this avoids accidental spills when the liquid is still thin. The final result was a dessert that felt elegant yet required almost no active cooking time, allowing us to enjoy conversation rather than a kitchen timer.
Real Tips From My Kitchen
– Add a splash of lime zest to the base for a subtle citrus lift that brightens the coconut flavor.
– Freeze a small portion of the mixture in silicone molds; you’ll have individual “coconut ice” bites for a fun twist.
– When unmolding, dip the ramekin briefly in warm water; the thin coating loosens the set without breaking it.
– Store the panna cotta in airtight containers to prevent it from absorbing other fridge odors.
– If you’re serving a crowd, multiply the recipe and pour into a large shallow dish; once set, cut into squares for easy portioning.
– For a dairy‑free version, use coconut cream exclusively and increase the gelatin to 3 teaspoons to maintain firmness.
Conclusion Creamy Coconut Panna Cotta Recipe
Making a Creamy Coconut Panna Cotta at home is less about fancy equipment and more about a few simple techniques that keep the process relaxed. You’ve seen the ingredients, the timing, the steps, and a handful of real‑world tips that come from actually cooking this dessert in my own kitchen. Give it a try on a night when you want something special but don’t want to spend hours in front of the stove. Share how it turned out, let me know which garnish you loved most, and feel free to explore the other dessert ideas on the site for more easy, comforting sweets.
FAQs Creamy Coconut Panna Cotta Recipe
Can I make this dessert ahead of time?
Yes. The panna cotta can be prepared up to two days in advance; just keep it refrigerated and covered.
What can I use if I’m allergic to gelatin?
Agar‑agar is a plant‑based alternative that sets at a higher temperature; use 1 teaspoon agar‑agar powder dissolved in the warm mixture.
How do I know when the panna cotta is set?
Gently shake the container; the surface should wobble slightly but not ripple like liquid. It will firm up further as it chills.
Can I add alcohol to the mixture?
A tablespoon of rum or coconut liqueur can be stirred in after the gelatin dissolves for an adult‑friendly flavor boost.
Why is my panna cotta grainy?
Over‑heating the dairy can cause the gelatin to break down and create a gritty texture. Keep the heat gentle and avoid a rolling boil.