How to make Cranberry Bars with Cream Cheese Frosting at home
There’s something undeniably comforting about baking in your own kitchen—especially when the world outside feels busy, cold, or simply overwhelming. And when you pull out a tray of warm Cranberry Bars with Cream Cheese Frosting, you create more than a dessert. You create a moment that feels familiar, grounding, and full of flavor.
Maybe you remember a holiday gathering, a cozy winter afternoon, or a time when someone surprised you with a homemade treat. That same warmth is what these bars bring back to life. With their bright pops of cranberry, soft cake-like texture, and velvety frosting, they feel like a small celebration on a plate. And the best part? You can make them right at home with ingredients you already trust.
This guide walks you through every step—simply, clearly, and with the kind of detail that helps you bake confidently, even if you’re still learning.
Table of Contents
Why You’ll Love These Cranberry Bars with Cream Cheese Frosting
When you prepare these bars, you’re creating a dessert that balances flavor, texture, and nostalgia all at once. Here’s why they often become a repeat favorite:
- You’re mixing tart cranberries with smooth sweetness—perfect for holiday flavors or year-round cravings.
- The recipe relies on simple pantry staples, so you won’t struggle to gather ingredients.
- The bars look stunning on a dessert table but require no complicated techniques.
- They feel like a bakery treat, but you can make them at home with minimal effort.
If you love desserts that taste as comforting as they look, these bars hit the mark every single time.
Ingredients You Need for Homemade Cranberry Bars with Cream Cheese Frosting
To help you stay organized, here’s everything you’ll need. Keep these tables handy while you prepare your workspace.
Ingredients for the Cranberry Bars
| Ingredient | Amount |
|---|---|
| Fresh or frozen cranberries | 2 cups |
| All-purpose flour | 1 ½ cups |
| Granulated sugar | 1 cup |
| Butter (softened) | ½ cup |
| Eggs | 2 |
| Vanilla extract | 1 tsp |
| Baking powder | 1 tsp |
| Salt | ¼ tsp |
Ingredients for the Cream Cheese Frosting
| Ingredient | Amount |
|---|---|
| Cream cheese (softened) | 8 oz |
| Butter (softened) | ¼ cup |
| Powdered sugar | 1 ½ cups |
| Vanilla extract | 1 tsp |
| Lemon zest (optional) | ½ tsp |
These ingredients come together easily, and most of them are likely already in your kitchen.
How to Make Cranberry Bars with Cream Cheese Frosting at Home
Below is the full step-by-step breakdown so you can prepare these bars confidently.
Step 1 – Prepare the Cranberry Bar Batter
This step sets the foundation for your bars, and it’s surprisingly simple.
- Start by creaming your softened butter with sugar. This gives your bars a fluffy, soft texture.
- Add eggs one at a time to keep the mixture light.
- Mix in your vanilla—this builds a warm aroma that enhances the cranberries.
- In a separate bowl, whisk together the flour, baking powder, and salt.
- Fold the dry mixture into the wet one until just combined. You want a soft, thick batter.
- Gently stir in your cranberries. Fresh or frozen cranberries both work.
Tip: If you’re using frozen cranberries, don’t thaw them. Cold berries prevent streaking and help the bars bake more evenly.
Step 2 – Bake the Cranberry Bars
Before the baking begins:
- Preheat your oven to 350°F (175°C).
- Line a baking pan with parchment paper or lightly grease it.
Spread your batter evenly into the pan. Smooth the surface gently with a spatula.
Bake for 25–30 minutes, or until the edges turn golden and a toothpick inserted comes out clean.
Once baked, set the pan aside and allow the bars to cool fully. This step is crucial—adding frosting to warm bars will cause it to melt.
Step 3 – Make the Cream Cheese Frosting
While the bars cool, prepare the frosting:
- Beat cream cheese and butter together until smooth.
- Gradually add powdered sugar to reach a creamy, velvety consistency.
- Add vanilla extract.
- Whip until the frosting becomes light and fluffy.
For a touch of freshness, add a hint of lemon zest. It enhances the flavor without overpowering it.
Step 4 – Frost and Slice Your Bars
Once the bars are cool:
- Spread your frosting evenly across the top.
- Chill the pan in the refrigerator for 20–30 minutes to help the frosting set.
- Cut the bars into squares, rectangles, or even diagonal diamond shapes.
You can top them with a sprinkle of cranberries, orange zest, or a dusting of powdered sugar if you want to add a little extra charm.
My Experience with Cranberry Bars with Cream Cheese Frosting
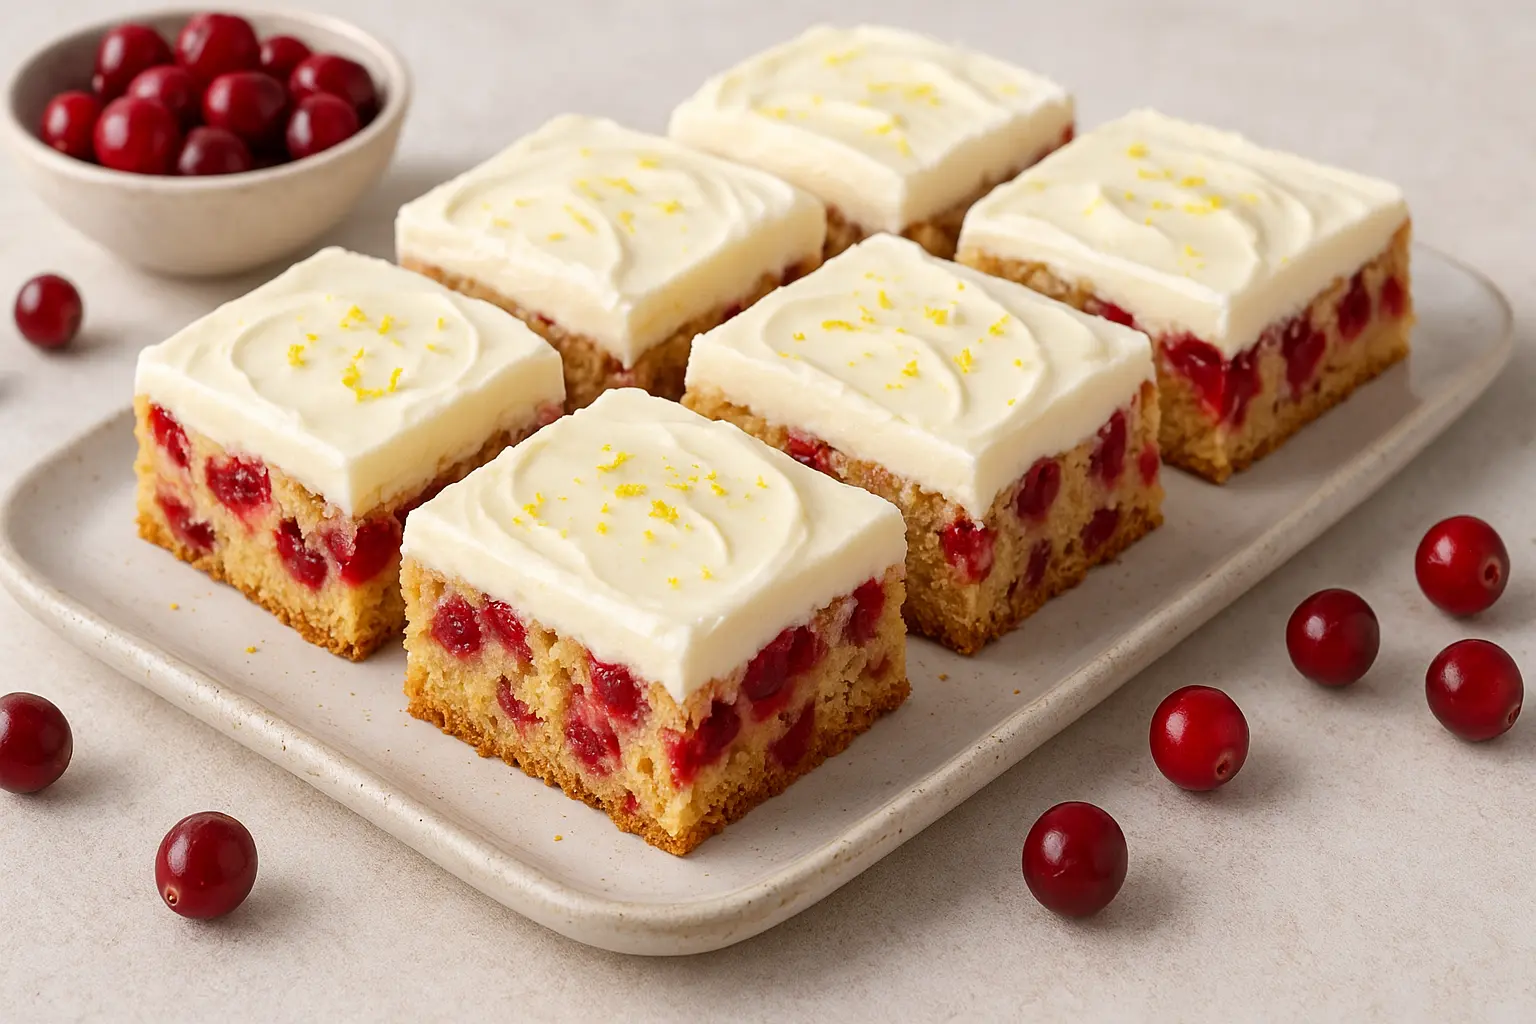
The first time I baked these bars, I was enchanted by the vibrant red cranberries peeking through the golden, tender crumb. The tartness of the berries balances the sweetness of the cream cheese frosting perfectly, and the soft texture makes every bite melt in your mouth.
Over time, I’ve learned a few tricks that make the bars even better: making sure the cranberries are evenly distributed, gently folding them into the batter to prevent crushing, and letting the frosting chill slightly before slicing to achieve clean edges. These bars have become a favorite in my kitchen, especially during holiday seasons when fresh cranberries are at their peak.
Real Tips From My Kitchen
- Use fresh or high-quality frozen cranberries
Fresh cranberries provide the best tartness, but frozen works too—just thaw and drain excess liquid. - Fold cranberries gently
This prevents them from breaking apart and keeps the bars visually appealing. - Cool completely before frosting
If the bars are warm, the cream cheese frosting can melt and become runny. - Room-temperature cream cheese
Softened cream cheese blends smoothly with butter and sugar, giving a creamy, lump-free frosting. - Cut with a sharp knife
Clean, precise cuts make the bars look professional; wipe the knife between slices for neat edges. - Adjust sweetness
Taste your frosting before spreading—it should balance the tartness of the cranberries without being overly sweet. - Storage tips
Store in an airtight container in the fridge for up to 5 days. They can also be frozen for longer storage.
Creative Variations
- Orange Cranberry Bars
Add orange zest to the batter or frosting for a bright citrus twist. - Chocolate Drizzle
Melted dark or white chocolate drizzled over the top adds extra decadence. - Nutty Cranberry Bars
Fold in chopped pecans or walnuts for crunch and a deeper flavor. - Spiced Bars
Add cinnamon, nutmeg, or ginger to the batter for a warm, cozy flavor—perfect for fall or winter. - Mini Bar Bites
Bake in a mini muffin or square pan for individual servings—great for parties or gifts. - Gluten-Free Option
Use a gluten-free flour blend for a tender, chewy alternative. - Vegan Version
Substitute dairy-free cream cheese and a plant-based butter for a fully vegan-friendly dessert.
Tips for Perfect Cranberry Bars Every Time
Even though this recipe is simple, small adjustments can elevate your results.
- Don’t overbake. The bars should remain soft and slightly moist.
- Use lemon zest in the frosting to brighten the flavor.
- Fold cranberries gently to prevent the batter from turning pink.
- Chill the bars before slicing for cleaner, sharper edges.
- Experiment with add-ins such as walnuts, pecans, or white chocolate.
If you like your desserts to have both contrast and balance, incorporating small additions makes the bars even more irresistible.
Tasty Variations for Cranberry Bars with Cream Cheese Frosting
You can easily personalize this recipe to match your cravings or seasonal ingredients.
Flavor Variations
- Orange Cranberry Bars: Add orange zest to both batter and frosting.
- Nutty Cranberry Bars: Stir in pecans or walnuts for crunch.
- Holiday Spiced Bars: Add cinnamon, nutmeg, or cloves for a warm seasonal twist.
Frosting Variations
- Lemon Cream Cheese Frosting for a bright, tangy finish
- White Chocolate Cream Cheese Frosting for added sweetness
- Whipped Frosting for a lighter, airy texture
Each variation gives your bars a unique personality, making them suitable for different occasions or preferences.
Storage and Make-Ahead Instructions
If you’re preparing these bars for a gathering or simply want to enjoy them over several days, here’s how you can store them:
- Keep bars in an airtight container in the refrigerator for 4–5 days.
- Freeze unfrosted bars for up to 3 months.
- Thaw frozen bars at room temperature and frost before serving.
- Avoid freezing with frosting already on top—it changes the texture.
These bars taste even better the next day, as the flavors settle into each other beautifully.
Nutrition Information (Approximate Per Serving)
- Calories: 260
- Sugar: 25g
- Carbs: 34g
- Fat: 12g
- Protein: 3g
These numbers may vary depending on your ingredient brands and portion sizes.
FAQ — Cranberry Bars with Cream Cheese Frosting
Below are some of the most common questions readers ask when preparing this recipe at home.
Can you use frozen cranberries for Cranberry Bars with Cream Cheese Frosting?
Yes, you can. Frozen cranberries work beautifully, and you don’t need to thaw them first.
How do you prevent the Cream Cheese Frosting from melting?
Make sure the bars cool completely before spreading the frosting. Even a slight warmth can cause sliding or melting.
Can you make Cranberry Bars with Cream Cheese Frosting a day ahead?
Absolutely. In fact, they often taste even better the next day since the flavors have more time to blend.
What can you use instead of cream cheese in the frosting?
You can replace cream cheese with mascarpone, Greek yogurt cream cheese, or a simple vanilla glaze.
Conclusion
Making Cranberry Bars with Cream Cheese Frosting at home isn’t just about following steps—it’s about creating something that feels comforting, festive, and satisfying. Whether you’re baking for family, preparing a holiday dessert tray, or treating yourself to something special, these bars offer a perfect blend of tart cranberries and sweet, creamy frosting that always hits the right note.
You now have every detail you need: ingredients, tables, techniques, tips, variations, and solutions to common questions. All that’s left is for you to preheat your oven and enjoy the process.
If you found this guide helpful, try baking your own batch today and share your results!
You can also explore more homemade dessert recipes, save this one for later, or pass it along to someone who needs a little sweetness in their day.
There are no reviews yet. Be the first one to write one.