How to Make a Classic Chocolate Yule Log for the Holidays
There’s something magical about the holidays — the cozy chill in the air, the glow of twinkling lights, and the smell of something sweet baking in your kitchen. You know that feeling when laughter fills your home, and the scent of chocolate mingles with memories of family gatherings? That’s the essence of the Chocolate Yule Log, a dessert that carries both nostalgia and elegance in every bite.
If you’ve ever admired those beautiful rolled cakes at bakeries during Christmas and thought they looked too hard to make, you’re about to discover how surprisingly easy (and enjoyable) it can be to create your own at home. In this guide, you’ll learn how to make a classic Chocolate Yule Log for the holidays, from sponge to frosting — and by the end, you’ll have a dessert that looks as impressive as it tastes.
Table of Contents
The Magic Behind the Chocolate Yule Log (Bûche de Noël)
Before you roll up your sleeves, it’s worth knowing where this dessert came from. The Chocolate Yule Log, or Bûche de Noël, originated in France and symbolizes warmth, light, and rebirth — inspired by the ancient tradition of burning a wooden log during the winter solstice to bring good fortune for the coming year. Over time, that log found its way into kitchens, transforming into a chocolate-covered sponge cake rolled and decorated to resemble the real thing.
So, when you prepare your own Yule Log, you’re not just baking a dessert — you’re continuing a story that’s been passed down for centuries. Each swirl of chocolate and cream represents comfort, celebration, and the sweet warmth of togetherness.
Ingredients You’ll Need for the Perfect Chocolate Yule Log
Every great dessert starts with quality ingredients. Gather everything before you start — it’ll make the process smoother and more enjoyable.
| Component | Ingredients | Quantity | Purpose / Notes |
|---|---|---|---|
| Sponge Cake | Eggs | 4 large | Room temperature for better volume |
| Granulated sugar | ¾ cup | Adds sweetness and structure | |
| All-purpose flour | ½ cup | Gives the sponge its body | |
| Cocoa powder | ¼ cup | Use unsweetened for rich flavor | |
| Baking powder | 1 tsp | Helps the cake rise lightly | |
| Salt | ¼ tsp | Balances sweetness | |
| Filling | Heavy cream | 1 cup | Cold for easy whipping |
| Powdered sugar | 3 tbsp | Sweetens and stabilizes | |
| Vanilla extract | 1 tsp | Adds fragrance and warmth | |
| Ganache Frosting | Semi-sweet chocolate | 1 cup (chopped) | Creates a glossy, rich coating |
| Heavy cream | ½ cup | Softens and blends the chocolate | |
| Butter | 2 tbsp | Adds shine and smooth texture |
Ingredient Tips:
- Use fresh eggs — their elasticity helps create that signature sponge texture.
- Opt for Dutch-processed cocoa if you want a deeper chocolate color.
- For a twist, mix a teaspoon of espresso powder into the batter — it enhances the cocoa flavor beautifully.
Step-by-Step Guide: How to Make a Classic Chocolate Yule Log
This process might look intricate, but once you start, you’ll see how simple it actually is. Let’s walk through it together.
Step 1 – Prepare the Sponge Cake
- Preheat your oven to 350°F (175°C) and line a 15×10-inch jelly roll pan with parchment paper.
- In a large bowl, beat the eggs and sugar until they’re pale and airy — this gives your cake its lift.
- Sift together flour, cocoa, baking powder, and salt.
- Gently fold the dry ingredients into the egg mixture. Avoid overmixing; a light touch keeps your sponge tender.
- Spread the batter evenly in your pan and bake for 10–12 minutes. You’ll know it’s ready when the surface springs back lightly to your touch.
Pro Tip: Avoid overbaking — a dry sponge will crack when rolled.
Step 2 – Roll the Sponge While Warm
Once baked, act quickly — this is where the “log” magic begins.
- Lay a clean kitchen towel on a flat surface and dust it lightly with powdered sugar.
- Turn your warm cake onto the towel and carefully peel off the parchment paper.
- Starting from one short end, roll the cake with the towel inside. This helps it “remember” the shape and prevents cracks.
- Set it aside to cool completely.
Rolling it warm might sound odd, but it’s the secret to achieving that perfect swirl later.
Step 3 – Make the Cream Filling
In a chilled bowl, beat the heavy cream, powdered sugar, and vanilla extract until stiff peaks form. You’ll notice how thick and airy it becomes — that’s the texture you want.
Once your cake is cool, gently unroll it and spread the cream evenly over the surface. Then, roll it back up carefully (without the towel this time) and refrigerate it while you prepare the frosting.
Step 4 – Create the Chocolate Ganache Frosting
In a heatproof bowl, add the chopped chocolate. Heat the cream in a small saucepan until it’s just about to simmer, then pour it over the chocolate. Let it sit for two minutes before stirring — this melts it gently for a silky finish.
Add the butter and mix until glossy and smooth. Let it cool slightly until it thickens to a spreadable consistency.
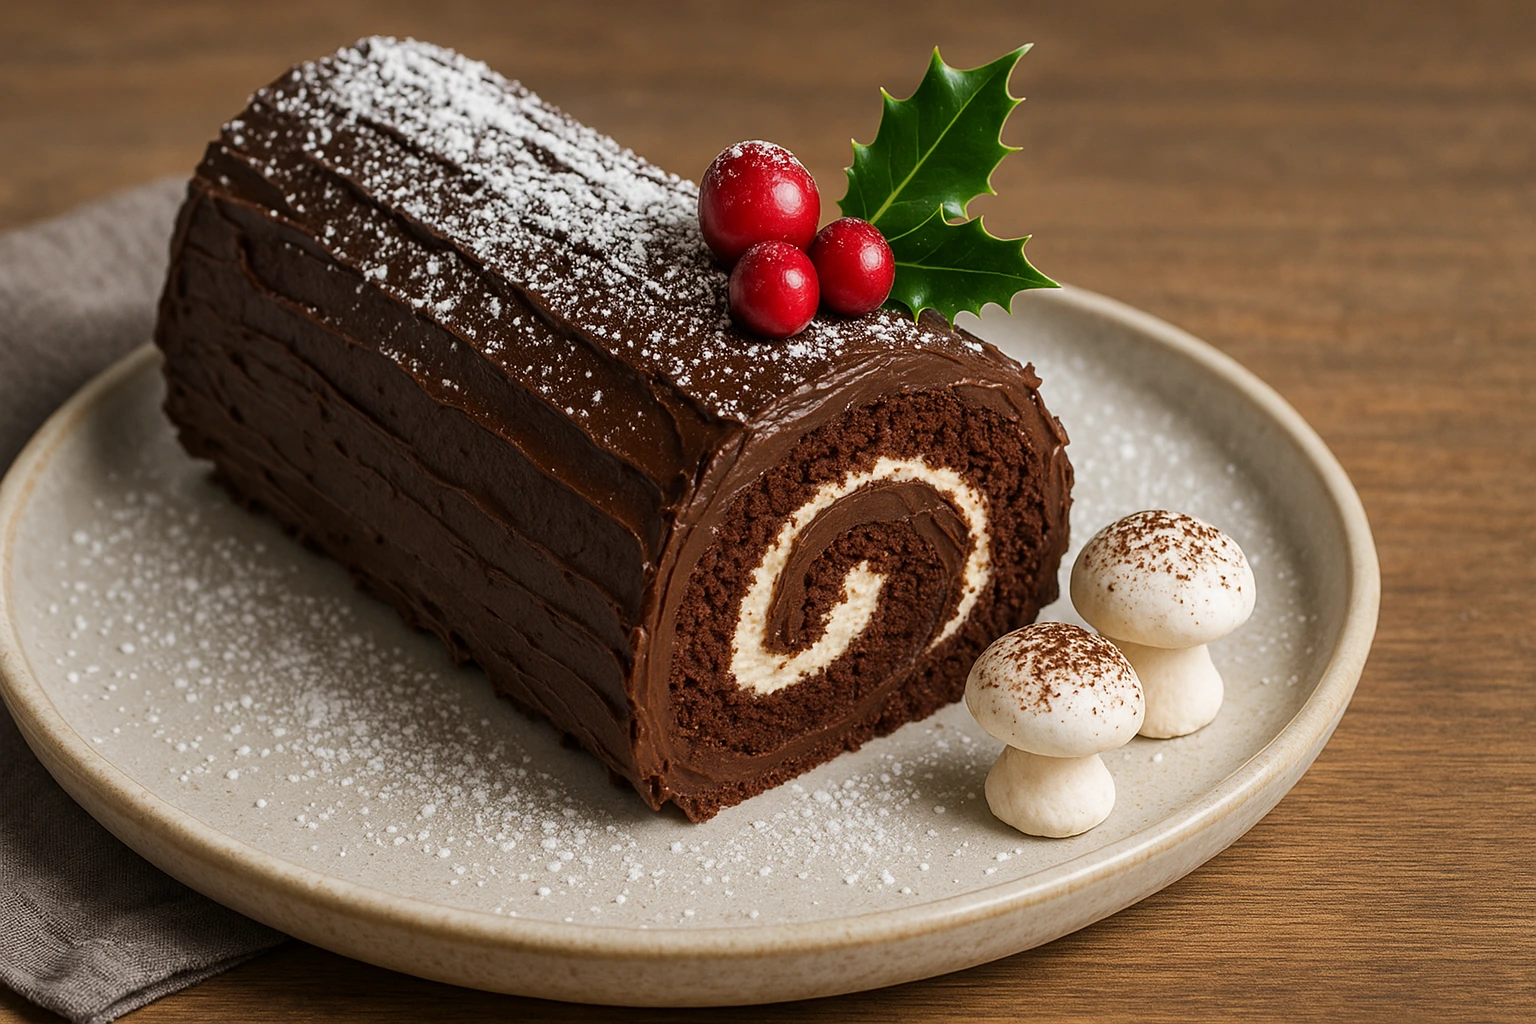
Step 5 – Frost, Decorate, and Transform
Place your rolled cake on a serving board. Spread the ganache all over, using a spatula to create texture. To mimic tree bark, drag a fork gently across the surface.
Dust with powdered sugar for a “snowy” effect, and add festive garnishes like:
- Meringue mushrooms
- Fresh cranberries or holly sprigs
- Chocolate curls or edible glitter
Take a step back and admire it — your Chocolate Yule Log now looks like it came straight from a patisserie.
Tips for the Perfect Chocolate Yule Log
- Roll it warm, frost it cold: Rolling when warm prevents cracks, frosting when chilled keeps it neat.
- Use a long, thin knife to slice clean portions without crushing the layers.
- Don’t skip chilling — a few hours in the fridge helps the flavors blend beautifully.
- Store smart: Keep it wrapped in plastic or in an airtight container for up to three days in the fridge.
Delicious Variations You Can Try
Once you’ve mastered the classic, experiment with fun twists that make it your own.
Mocha Yule Log
Add espresso to the ganache and filling for a rich, coffee-flavored version.
Peppermint Chocolate Yule Log
Stir in a drop of peppermint extract and sprinkle crushed candy canes over the frosting.
White Chocolate Yule Log
Swap dark cocoa for white chocolate ganache and decorate with coconut flakes for a “snowy” theme.
Gluten-Free Option
Use almond flour or a gluten-free baking mix instead of all-purpose flour — you’ll still get a light, airy sponge.
Serving and Presentation Tips
Presentation is half the charm. When it’s time to serve your Yule Log:
- Use a warm knife (dip it in hot water, then dry it) for clean slices.
- Serve with a dollop of whipped cream or a scoop of vanilla ice cream.
- Dust the plate with cocoa powder or powdered sugar for that elegant touch.
This dessert doesn’t just taste indulgent — it’s a centerpiece that brings instant holiday cheer to your table.
Nutritional Information (Per Slice)
| Nutrient | Amount |
|---|---|
| Calories | 280 |
| Fat | 17g |
| Carbohydrates | 28g |
| Protein | 4g |
| Sugar | 20g |
Tip: This dessert is meant to be savored, not rushed. Enjoy it in moderation and embrace the celebration.
Frequently Asked Questions (FAQs) About Chocolate Yule Log
1. How do I prevent my Chocolate Yule Log from cracking when rolling?
Roll the sponge while it’s still warm using a towel. This trains it to hold its shape without splitting later.
2. Can I make a Chocolate Yule Log ahead of time?
Yes! You can make it a day before serving and store it in the fridge. The flavors deepen overnight.
3. Can I freeze a Yule Log?
Absolutely. Wrap it tightly in plastic wrap and freeze (without ganache) for up to a month. Thaw in the fridge before frosting.
4. What’s the best way to decorate it?
Use ganache for the bark texture, dust with powdered sugar for snow, and top with berries or meringue mushrooms.
5. Can I make it gluten-free?
Yes — substitute flour with a gluten-free blend or almond flour for a naturally rich texture.
6. How long will it last?
Your Yule Log can stay fresh for up to 3–4 days in the refrigerator if covered properly.
Conclusion: A Tradition Worth Keeping
When you slice into your Chocolate Yule Log, you’re not just serving dessert — you’re sharing a piece of history, love, and creativity. Every layer, every swirl of cream, carries a story of celebration and warmth.
Baking this cake at home lets you slow down and appreciate the season — to make memories, not just meals. So, the next time your kitchen fills with the scent of chocolate and the sounds of laughter, you’ll know you’ve created something truly special.
Now it’s your turn! Gather your ingredients, roll up your sleeves, and bring this Chocolate Yule Log to life in your own kitchen. Share your creation with friends or post your masterpiece online — and let the spirit of the holidays shine through every slice.
Because the best gifts you can give this season aren’t found under the tree — they’re baked from the heart.