Discover how to make a delicious Butterfinger Candy Bar Poke Cake with this easy step-by-step recipe
Imagine biting into a dessert that’s rich, gooey, and packed with your favorite childhood candy. That’s exactly what this Butterfinger Candy Bar Poke Cake recipe delivers. Every slice is a perfect combination of soft cake, creamy filling, and crunchy candy pieces that make your taste buds dance. Whether you’re preparing for a family gathering, a birthday, or just a sweet treat for yourself, this recipe will not disappoint. In this guide, you’ll discover an easy, step-by-step way to make a dessert that’s as indulgent as it is memorable.
Table of Contents
Why You’ll Love This Butterfinger Candy Bar Poke Cake Recipe
There’s something magical about combining a classic candy bar with a soft, moist cake. Here’s why you’ll enjoy making and eating this cake:
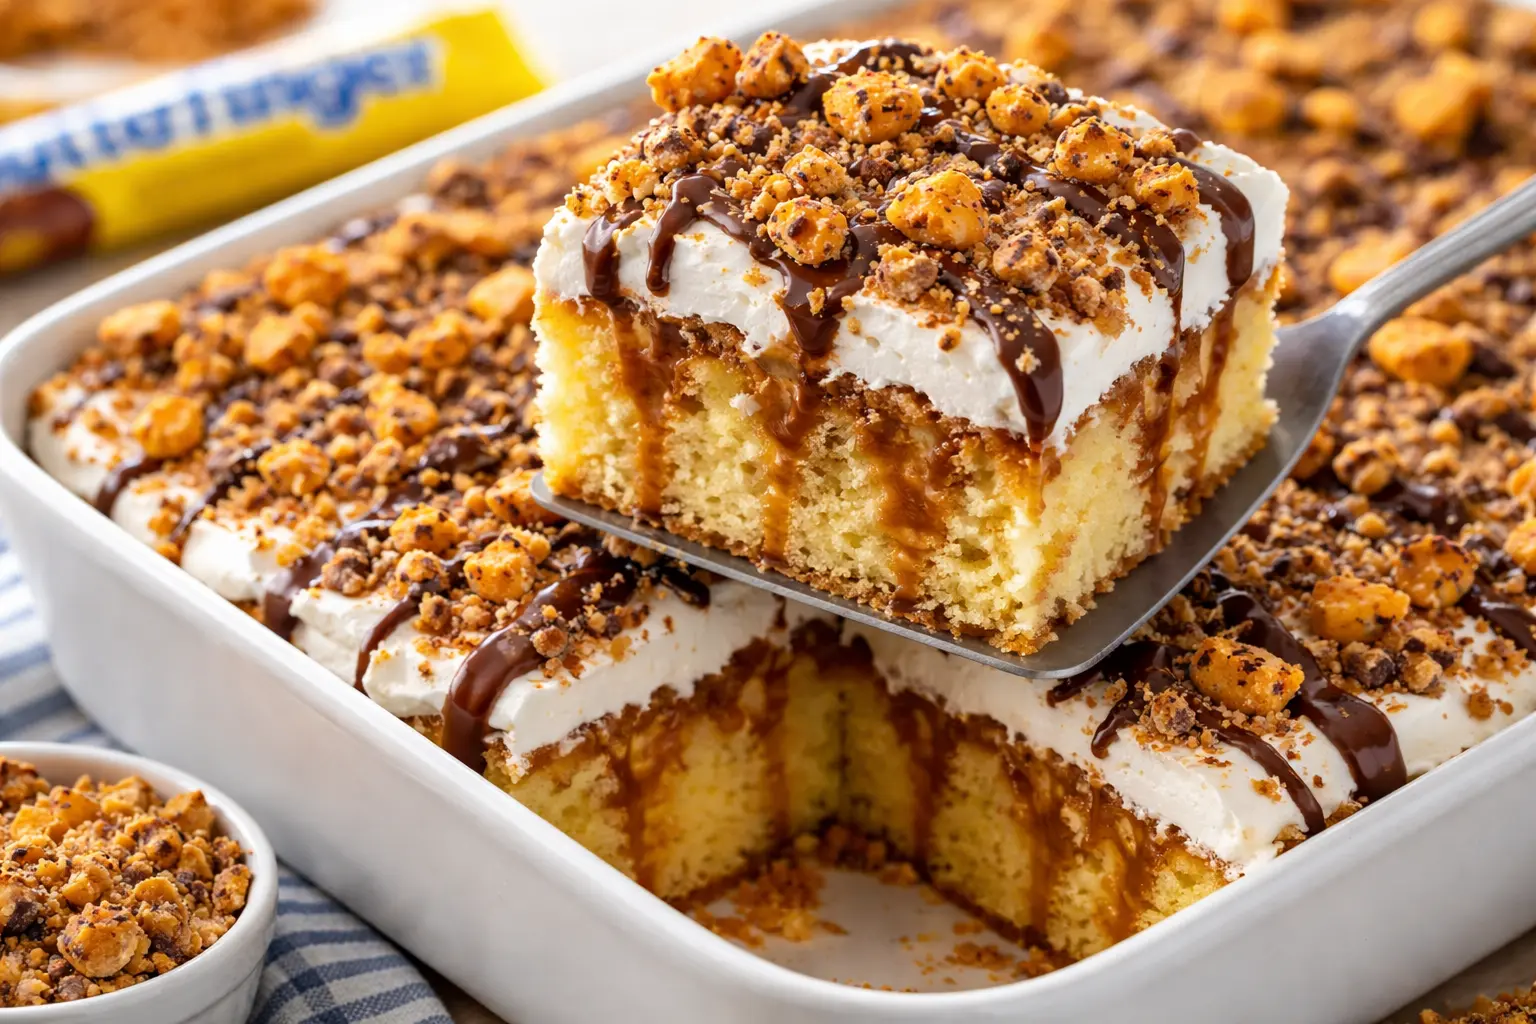
- Rich, layered flavors: Chocolate, peanut butter, and caramel combine for a decadent bite every time.
- Easy to make: With simple ingredients and clear steps, you can have this dessert ready in no time.
- Perfect for sharing: Whether for parties, holidays, or casual family nights, this cake impresses everyone.
This cake isn’t just dessert; it’s an experience. Each forkful evokes nostalgia and joy, making it one of the most satisfying treats you can prepare.
Ingredients for Your Butterfinger Candy Bar Poke Cake Recipe
To make your Butterfinger Candy Bar Poke Cake a success, gather all the necessary ingredients beforehand. Using the right amounts ensures your cake comes out perfectly moist and flavorful.
Poke Filling Ingredients for Butterfinger Candy Bar Poke Cake Recipe
| Ingredient | Quantity | Notes |
|---|---|---|
| Yellow cake mix | 1 box | Or use homemade yellow cake for extra flavor |
| Eggs | 3 | Room temperature |
| Vegetable oil | 1/2 cup | |
| Water | 1 cup |
Poke Filling
| Ingredient | Quantity | Notes |
|---|---|---|
| Sweetened condensed milk | 1 can (14 oz) | |
| Peanut butter | 1/2 cup | Creamy works best |
| Butterfinger candy bars | 2 cups | Chopped for texture |
Topping
| Ingredient | Quantity | Notes |
|---|---|---|
| Whipped cream | 2 cups | Or your preferred frosting |
| Additional Butterfinger | 1/2 cup | For garnish |
| Chocolate drizzle | Optional | Melted chocolate chips work well |
Step-by-Step Instructions Butterfinger Candy Bar Poke Cake recipe
Follow these steps carefully to create a Butterfinger Candy Bar Poke Cake that wows every time:
Step 1: Prepare the Cake
- Preheat your oven according to the cake mix instructions.
- Grease your baking pan or line it with parchment paper.
- Mix the cake ingredients until smooth, then pour into the pan.
- Bake as directed, then allow it to cool slightly.
Step 2: Poke the Cake
- Once slightly cooled, use the handle of a wooden spoon or a skewer to make evenly spaced holes across the cake. This allows the filling to soak in, creating a gooey texture.
Step 3: Add the Filling
- Combine sweetened condensed milk and peanut butter until smooth.
- Pour the mixture evenly over the cake, letting it seep into the holes.
- Sprinkle chopped Butterfinger pieces on top, pressing lightly to set.
Step 4: Top and Decorate
- Spread whipped cream evenly across the cake surface.
- Sprinkle extra Butterfinger pieces on top and optionally drizzle with melted chocolate for a finishing touch.
Step 5: Chill and Serve
- Allow the cake to chill for at least 30 minutes before slicing.
- Serve with a smile and enjoy the rich, layered flavors!
Tips for Perfecting Your Butterfinger Candy Bar Poke Cake recipe
To ensure your cake is every bit as delicious as it looks:
- Use room-temperature ingredients for smoother batter and even baking.
- Chop candy bars evenly so they don’t sink too deeply.
- Chill before serving to allow flavors to meld and the filling to set.
- Experiment with toppings: Caramel drizzle or chocolate ganache can take it to the next level.
Why This Cake Works for Any Occasion
This dessert is versatile, making it perfect for:
- Family gatherings: Kids and adults alike will adore it.
- Holidays and birthdays: Its rich, layered flavor makes it a crowd-pleaser.
- Last-minute treats: Quick to prepare yet impressive in presentation.
With a combination of familiar flavors and eye-catching presentation, this cake always makes a statement.
Frequently Asked Questions (FAQs)
Q1: Can I make this cake ahead of time?
- Yes, prepare it a day in advance and refrigerate. The flavors only improve as it sits.
Q2: Can I substitute other candy bars?
- Definitely! Snickers, Twix, or Heath bars work beautifully.
Q3: How long does the cake last?
- Store in an airtight container in the fridge for up to 4 days.
Q4: Can I make it gluten-free?
- Yes, just use a gluten-free yellow cake mix and ensure candy bars are free of gluten.
Conclusion
Your Butterfinger Candy Bar Poke Cake isn’t just a dessert—it’s a celebration of flavor, texture, and nostalgia. By following this recipe, you’ll create a cake that’s moist, gooey, and delightfully crunchy, making it a hit with everyone who tastes it.
So go ahead—grab your ingredients, follow the steps, and treat yourself and your loved ones to a slice of pure indulgence. Don’t forget to share your creation and spread the joy of this unforgettable dessert!
Try this Butterfinger Candy Bar Poke Cake Recipe today and let us know how it turns out! Share your photos, tips, or creative variations in the comments below.
There are no reviews yet. Be the first one to write one.