
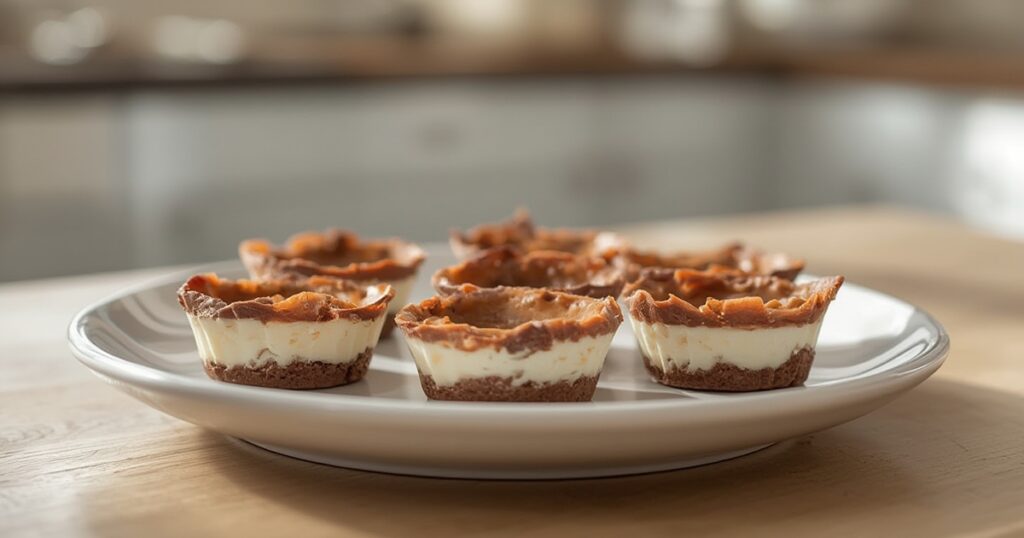
Peanut Butter Chocolate Shell Yogurt Cups
When I first made these Peanut Butter Chocolate Shell Yogurt Cups, it was one of those afternoons when I wanted something sweet but didn’t feel like turning on the oven or committing to a complicated dessert. I had yogurt in the fridge, an open jar of peanut butter on the counter, and some chocolate chips that needed to be used. In my kitchen, this recipe came together quickly and felt comforting in a very simple way. The contrast between the creamy yogurt filling and the crisp chocolate shell is what really won me over. It’s the kind of treat I now make when I want a quiet dessert moment without much fuss or cleanup.
Table of Contents
Ingredients List: Peanut Butter Chocolate Shell Yogurt Cups
- 1 cup Greek yogurt (I usually use full-fat for the creamiest texture)
- ½ cup natural peanut butter (smooth or crunchy both work)
- ¼ cup honey or maple syrup
- 1 teaspoon vanilla extract
- ½ cup dark chocolate chips
- 2 tablespoons coconut oil
- ¼ teaspoon sea salt
- Optional toppings: crushed peanuts, shredded coconut, or a light drizzle of caramel
Timing: Peanut Butter Chocolate Shell Yogurt Cups
- Prep time: about 15 minutes
- Chilling time: 45 minutes
- Total time: around 1 hour
Step-by-Step Instructions: Peanut Butter Chocolate Shell Yogurt Cups
Step 1: Mix the base
In a medium bowl, stir together the Greek yogurt, peanut butter, honey, vanilla extract, and sea salt. Mix until smooth and evenly combined.
Tip: If your peanut butter is very thick, let it sit at room temperature for a few minutes before mixing—it blends much more easily.
Step 2: Portion the cups
Spoon the yogurt mixture into silicone muffin cups or a lined muffin tin, filling each about three-quarters full. Gently tap the tray on the counter to smooth the tops.
Tip: Keeping the surface fairly flat helps the chocolate layer spread evenly later.
Step 3: Melt the chocolate
Add the chocolate chips and coconut oil to a microwave-safe bowl. Heat in short bursts, stirring each time, until the chocolate is fully melted and smooth.
Tip: Stop heating as soon as the last few chips melt to avoid scorching the chocolate.
Step 4: Coat the cups
Spoon a thin layer of melted chocolate over each yogurt cup, nudging it toward the edges so the filling is sealed in. You don’t need a thick layer—just enough to form a shell.
Step 5: Chill and set
Place the tray in the refrigerator for about 45 minutes, or until the chocolate is firm to the touch.
Step 6: Add finishing touches
Once set, remove the cups from the molds and add any toppings you like just before serving.
My Experience With This Recipe
I first made these yogurt cups on a weeknight after dinner, when I wanted dessert but didn’t want anything heavy. What surprised me most was how satisfying they felt for such a simple recipe. The chocolate shell snaps nicely when cold, and the yogurt filling stays creamy without being runny.
The first time around, I made the mistake of pouring the chocolate on while it was still very hot. It slightly melted the top of the yogurt layer and mixed in more than I wanted. Now, I let the chocolate cool for a minute or two before adding it on top, and that small pause makes a big difference.
What worked really well was using silicone molds. They make removing the cups effortless and keep the edges clean. I’ve also learned that chilling the yogurt cups briefly before adding the chocolate helps the layers stay more defined.
If I had to give one practical tip from my kitchen, it would be this: don’t rush the chilling step. Letting the cups fully set gives you that crisp chocolate shell that makes the recipe special.
Real Tips From My Kitchen
- If the yogurt mixture tastes slightly tangy, add an extra spoon of honey before portioning.
- Store the cups in a single layer so the chocolate shells don’t crack.
- Let the cups sit out for 3–5 minutes before eating for the best texture.
- A thin chocolate layer works better than a thick one—it’s easier to bite into.
- These keep their texture best when stored chilled, not at room temperature.
Common Mistakes to Avoid
- Overfilling the molds, which can cause the chocolate to slide off the sides
- Pouring very hot chocolate directly onto warm yogurt
- Skipping the salt, which balances the sweetness
- Using paper liners without support—they can bend and spill
Storing Tips
Keep the Peanut Butter Chocolate Shell Yogurt Cups in an airtight container in the refrigerator for up to five days. If stacking them, place parchment paper between layers to protect the chocolate shell. They can also be frozen and thawed briefly before eating, though I prefer them straight from the fridge.
These Peanut Butter Chocolate Shell Yogurt Cups have become one of those recipes I return to again and again. They’re easy, reliable, and feel homemade in the best way—exactly the kind of dessert I like to keep in my rotation.
Here’s the rest of your improved article with all the sections you requested, rewritten in a natural, first-person cooking voice and cleaned up for clarity:
Nutritional Information Peanut Butter Chocolate Shell Yogurt Cups
Here’s a rough idea of what one Peanut Butter Chocolate Shell Yogurt Cup contains:
- Calories: ~180 kcal
- Protein: ~8 g (thanks to the Greek yogurt)
- Fat: ~12 g (about 5 g saturated)
- Carbohydrates: ~14 g (mostly from natural sweeteners)
- Fiber: ~2 g
- Calcium: ~150 mg
I don’t obsess over exact numbers when I make these, but it’s nice to know that they’re a lighter alternative to ice cream or a heavier dessert, and the protein keeps me satisfied for a little longer.
Healthier Alternatives for the Peanut Butter Chocolate Shell Yogurt Cups Recipe
- Swap honey or maple syrup for a lower-sugar sweetener like monk fruit or allulose.
- Use almond or cashew butter instead of peanut butter for less saturated fat.
- Choose 85 % dark chocolate for more antioxidants and less sugar.
- Stir in a small scoop of protein powder to the yogurt mixture for an extra protein boost without changing texture much.
- Use coconut- or almond-based yogurt to make it dairy-free or vegan.
Serving Suggestions: Peanut Butter Chocolate Shell Yogurt Cups
- Arrange them on a small board with fresh berries for a colorful dessert tray.
- Pair with a chilled coffee or oat milk latte for an afternoon treat.
- They’re perfect mini-portions for breakfast, post-workout snacks, or lunchbox desserts.
- Top with a few toasted nuts or a light drizzle of caramel just before serving for a little extra flair.
Common Mistakes to Avoid
- Skipping chill time: The chocolate shell needs to harden fully to get that satisfying snap.
- Pouring hot chocolate too fast: This can melt the yogurt layer slightly.
- Overfilling the cups: Stick to three-quarters full for neat results.
- Using low-quality chocolate: Cheap chocolate can become grainy when it sets.
- Neglecting a pinch of salt: It balances the sweetness and enhances flavor.
Storing Tips
- Refrigerator: Keep in an airtight container for up to 5 days.
- Freezer: Freeze the cups on a tray first, then transfer to a zip-top bag. They last up to 2 months.
- Serving after freezing: Let them thaw 5–7 minutes at room temperature; the chocolate shell softens just enough to bite through cleanly.
Conclusion Peanut Butter Chocolate Shell Yogurt Cups
Making these Peanut Butter Chocolate Shell Yogurt Cups has become a go-to in my kitchen for when I want a simple, satisfying dessert. They’re quick to make, customizable, and always feel special. From chilling the cups to the first satisfying crack of the chocolate shell, the process is as enjoyable as the final treat. I love that they’re easy to adjust to my dietary preferences without losing any of the indulgent texture or flavor.
FAQs
Q1: Can I make these cups ahead of time for a party?
A: Yes! Prepare them up to 48 hours in advance and store in the fridge. Add toppings just before serving for the best texture.
Q2: Can I make a low-dairy version?
A: Absolutely. Use coconut- or almond-based yogurt and dairy-free chocolate. The flavor is still rich and satisfying.
Q3: How do I make these vegan?
A: Replace peanut butter with almond or cashew butter, use maple syrup instead of honey, and pick a vegan chocolate chip. The method stays exactly the same.
Q4: Why does the chocolate sometimes look streaky?
A: That happens if the chocolate isn’t fully melted or cools too fast. Let it melt gently and pour when it’s slightly cooled to avoid streaks.
Q5: Can I add fruit inside the cup?
A: Yes! A thin slice of strawberry or a few blueberries under the yogurt adds natural sweetness and a fun surprise inside each cup.